Performing a traditional squat without sufficient ankle mobility or lack of mobility for any other joint is a receipt for disaster.
If you have been doing traditional squats with poor ankle mobility, you have an increased chance of developing dysfunctional strength, getting injured, and building muscle imbalances.
Based on my experience and 30-hour research on elevated heel squats, I compiled all the necessary information to perform them correctly.
Quick Summary
- Executing the heel-elevated squat involves using a squat wedge or appropriate weight plates to raise the heels and address issues related to poor ankle mobility.
- To perform heel-elevated squats correctly, you must use a platform not higher than 2.5 inches and only pick the height based on your current ankle mobility.
- According to a study on ResearchGate, beginners in weightlifting may find it safer for their spine to perform back squats with slightly raised heels, while experienced weightlifters may not derive as much benefit from this technique.
- In my opinion, heel-elevated squats are a great option for individuals dealing with poor ankle mobility, but I think they should never completely replace regular back squats.
What Is a Heel Elevated Squat?
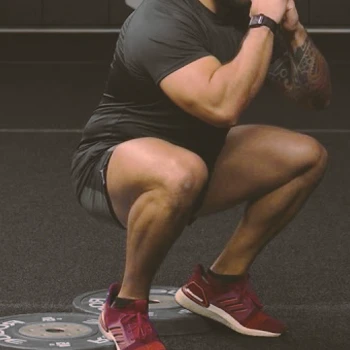
A heel-elevated squat is a variation of the back squat that involves placing elevated surfaces under the heels to address limited ankle mobility.
This adjustment proves especially beneficial for individuals with poor ankle flexibility and athletes recovering from ankle injuries.
By using this modification, individuals can enjoy the benefits of squatting without resorting to compensatory movements that could potentially lead to injuries and muscle imbalances.
Over the years of adding this modification to my clients' routines, I've observed improvements in leg muscle engagement among those recovering from ankle injuries, as supported by research from the National Institute of Health [1].
"The heels-elevated goblet squat is one heck of a warm-up exercise. It’s also a good postural tool and, above all, absolutely demolishes your quadriceps — and you don’t have to lift heavy to reap all those benefits, either."
- Jake Dickson, Certified Personal Trainer
How to Perform Heel Elevated Squats
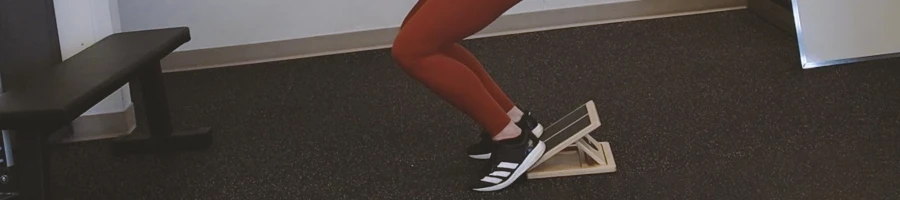
Here is the proper technique to perform heel-elevated squats without any risk of injury:
- Place two weights that are not higher than 2.5 inches close to each other to serve as the platform for elevating your heels.
- You may also pick squat wedges of sufficient height.
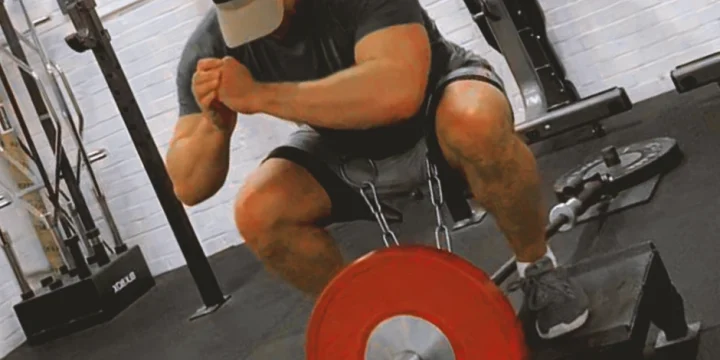
- Place the barbell on the squat rack and load it with sufficient weight so you can perform at least 8 reps without a pause.
- Place the loaded barbell on your upper back on your trapezius and posterior deltoid muscles.
- Unrack the barbell and take two steps back. Place your heels on the elevated surface.
- Slightly turn your toes outward and ensure your knees are always aligned with your toes during the whole exercise.
- Start the exercise by performing triple flexion - bend your hips, knees, and ankles simultaneously.
- Descend until your inner thighs become parallel to the ground, and hold that position for one second.
- Reverse the motion to return to the starting position by initiating the triple extension - extend your ankles, knees, and hips.
- Repeat for 4 sets, 8 reps, and rest for 3 minutes between each set.
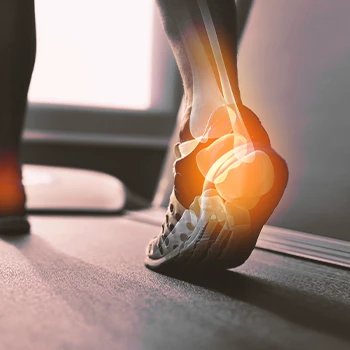
What Does Elevating Your Heels Do for Squats and Ankle Mobility?

Elevating your heels gives you an edge in squats because it compensates for poor ankle mobility and the inability to perform sufficient ankle dorsiflexion, according to the National Institute of Health [2].
Elevating your heels changes the structure of the squat exercise, allowing for more pressure to be placed on the knees, which is the biggest downside of this exercise, alongside developing dysfunctional strength.
Both squat variations, conventional squat, and heel-elevated squat target the same muscles. However, the elevated heels will change the original squat form and allow for deeper squat depths for those with impaired ankle mobility.
Learn More: Exercises to Increase Ankle Mobility and Flexibility
Heel Elevated Squats Benefits

There are key benefits to heel-elevated squats for individuals with impaired ankle mobility.
Reduce Stress on the Lower Back
Research from PubMed indicates that elevating your heels changes the exercise angle, shifting pressure from the lower back to the knees, reducing chronic pain and potential injuries during training [3].
Also Read: Best Lower Back Exercises for Bodybuilding
Better Squat Depth
Elevated heels intentionally deepen squats by directing additional bending to the knees rather than the hips. However, this altered depth may falsely convey proper squat depth and hip mobility.
Improved Stability
Elevating heels enhances stability by preventing excessive forward bending due to inadequate ankle dorsiflexion. Proper technique is crucial for injury prevention and efficient, flawless execution, as seen in top athletes like LeBron James conserving energy during competitions [4].
Increased Strength
Performing heel-elevated squats can boost lower body strength, but it often results in short-term, dysfunctional strength. Optimal recovery and mobility training are recommended to rejuvenate joints and restore ankle mobility.
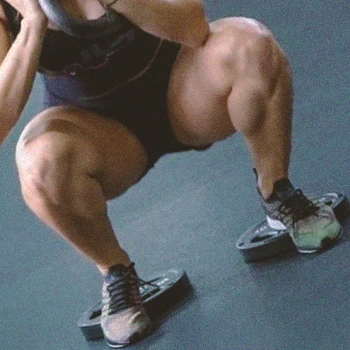
Targets the Quads
Heel-elevated squats simultaneously benefit and challenge the quads by increasing pressure on the knees, leading to significant muscle hypertrophy. The emphasis on knee movement over hip movement promotes quad strength and hypertrophy, according to the National Institute of Health [5].
Related: Best Quad Exercises For Building Strength and Hypertrophy
Disadvantages of Heel-Elevated Squats

Here are the most significant disadvantages of heel-elevated squats.
Stress on the Knee Joints
The weight shift increases pressure on your knee joint, requiring more effort from your quads.
However, this can lead to potential injuries at the ligament and cartilage level if not programmed, rested, nourished, and supplemented properly.
Periodic use or limited application, especially during injury recovery, is advised. Consider these squats as a temporary measure until you regain your initial range of motion.
Not a Long Term Solution
Heel-elevated squats do not provide a permanent solution for addressing poor ankle mobility and dorsiflexion.
It is advisable to use these squats primarily in the initial stages of recovery after an injury.
The main focus during rehabilitation should be on restoring ankle mobility as the primary goal.
Common Mistakes of the Heel Elevated Squat

Here are the most common mistakes to avoid when performing heel-elevated squats.
Internally Rotating Knees
Avoid internally rotating your knees during squats, including heel-elevated squats, as it increases pressure on outer knee/tibial condyles and can lead to ligament injuries like ACL and PCL tears.
Excessive Elevation of the Heel
Avoid elevating your heels excessively, as it puts undue pressure on your knees. Limit the height of squat wedges to what is necessary, never exceeding 2.5 inches to prevent serious lower body injuries.
Insufficient Posterior Chain Activation
Higher heel elevation reduces stress on posterior chain muscles (glutes and hamstrings). To address this, remove squat wedges to promote forward torso bending at the hips. Posterior chain muscles affected by inactivity include:
- Gluteus medius
- Gluteus minimus
- Gluteus maximus
- Biceps femoris
- Semitendinosus
- Semimembranosus
Who Should Perform the Heel Elevated Squat?
People who injure their ankles and lack mobility should perform the heel-elevated squat.
Heel-elevated squats can serve as an alternative exercise during recovery until you recover the necessary range of motion to perform regular squats again.
Otherwise, if you are a healthy lifter without any mobility issues, stick with regular squat variations such as the barbell back squat, front squat, crush grip goblet squat, and similar.
"Fresh-faced gym goers and world-class strength athletes don’t have a lot in common, but there’s one throughline that matters — the squat is integral to both of them."
- Mike Dewar, Certified Personal Trainer
Alternatives to a Heel Elevated Squat
Here are heel-elevated squat alternatives you may consider implementing into your workout routine.
Dumbbell Squats
Dumbbell squats are an excellent alternative for your body to achieve greater squat depths. It is an excellent exercise to transition from an injured state while only performing heel-elevated squats.
How to Perform Dumbbell Squats
- Pick two dumbbells of appropriate weight so you can perform at least 12 reps without resting.
- Assume standing, feet a little wider than shoulder-width apart, and point your toes slightly outward.
- Let the dumbbells hang in your hands on the sides of your body, the same way as in the anatomical position. Ensure your knees are in line with your toes when performing the exercise.
- Start the exercise by bending your hips, knees, and ankles to transition to a deep squat position.
- Hold that position for one second when your thighs reach the parallel position with the ground.
- Reverse the motion to return to the starting position.
- Repeat for 12 reps, 4 sets, and rest for 90 seconds between the sets.
Kettlebell Squats

Kettlebell squats and dumbbell squats share the same exercise principle, but kettlebell squats are considered more functional due to the unique design and handle of kettlebells, allowing for the most significant range of motion in any exercise.
How to Perform Kettlebell Squats
- Pick two kettlebells of appropriate weight so you can perform 10 consecutive reps without making a pause.
- Assume a standing position, feet a little wider than shoulder-width apart, and ensure your feet are slightly turned outward to allow for greater squat depths.
- Let the kettlebells hang in your hands near your body, like in the previous exercise with dumbbells.
- Start the exercise by initiating the triple flexion - bend your hips, knees, and ankles simultaneously to transition to the bottom of the squat.
- Hold that position for one second when your inner thighs become parallel to the ground.
- Reverse the motion to return to the starting position.
- Repeat for 4 sets, 10 reps, and rest for 2 minutes between the sets.
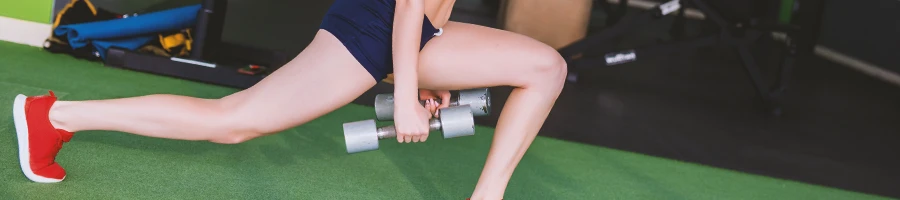
Spanish Squats With Exercise Ball
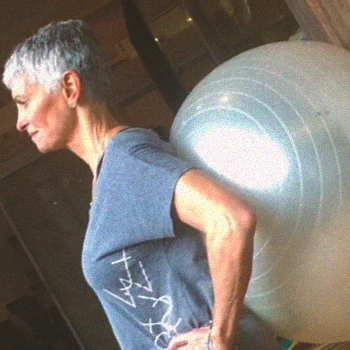
Spanish squats are my favorite because they are excellent for athletes and will introduce enough versatility to your workout to avoid monotony and keep your motivation high.
We will use an exercise ball with a barbell to perform Spanish squats this time.
How to Perform Spanish Squats With an Exercise Ball
- Place the barbell on the floor and load it with the appropriate weight so you can perform at least 8 reps.
- Bring one exercise ball and place it against the wall. Place the loaded barbell in front of the exercise ball.
- Get in between those two pieces of equipment and put the exercise ball between your middle back area and the wall so it “hangs in the air.”
- Step over the barbell so it is located between your feet in front and the wall behind.
- Take a pronated grip with your hands and lift the barbell with your hands extended slightly behind your back.
- Assume a three-quarter squat position with the barbell hanging in your hands below your butt and an exercise ball placed between your middle back and the wall.
- Start the exercise by squatting down while allowing the ball to roll and help you achieve the desired squat depth.
- When your thighs parallel the ground, reverse the motion to return to the starting position.
- Repeat for 8 reps, 4 sets, and rest between 2 and 5 minutes between the sets.
FAQs
Should I Elevate My Heels When Squatting?
It depends on your ankle mobility if you should elevate your heels when squatting. An elevated heel squat is an excellent lower body exercise you should only use if you lack sufficient ankle mobility to perform dorsiflexion and achieve the proper squat depth.
How High Should Heels Be Elevated for Squats?
How high heels should be elevated for squats depends on your ankle’s range of motion. Elevated heel squats usually require a maximum of 2.5 inches of elevation to squat deeper without compensating with your upper body and hips.
Is Squatting With Heels Elevated Better Than Flat?
If you have a limited range of motion in your ankles, squatting with heels elevated is better than flat. However, if your ankle joints are healthy and you can keep an upright torso while squatting, you may continue with traditional squats.
References:
- https://www.ncbi.nlm.nih.gov/pmc/articles/PMC9312299/
- https://www.ncbi.nlm.nih.gov/pmc/articles/PMC5574351/
- https://pubmed.ncbi.nlm.nih.gov/33775082/
- https://www.ncbi.nlm.nih.gov/pmc/articles/PMC1123979/
- https://www.ncbi.nlm.nih.gov/pmc/articles/PMC6950543/
About The Author
You May Also Like