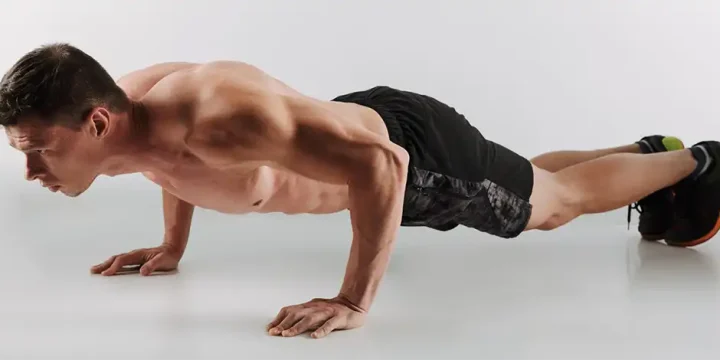
Push-ups are a fantastic compound exercise to target your chest as well as your back and arm muscles. And while you might have dreams of one day doing one-arm or decline push-ups, you’re better off starting with the right technique.
I’ve often seen people do ten-half push-ups where they don’t even get their elbows to a right angle, and then they pat themselves on the back for a great workout.
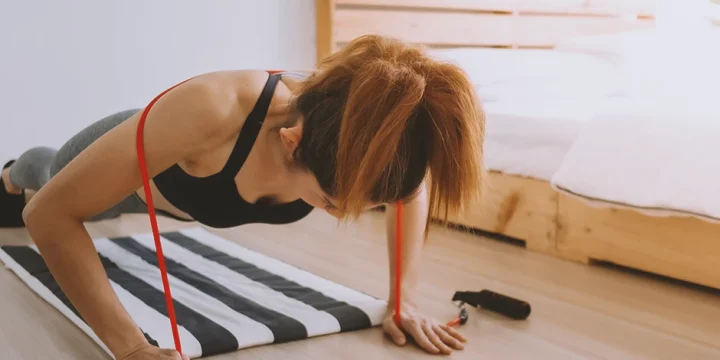
But if that’s all you can currently do with your level of strength, then incline push-ups are definitely the better option for your upper body.
Here’s how to do them properly.
Quick Summary
- To perform incline push-ups, place your hands on an elevated surface like a bench, keep your body in a straight line from head to heels, and lower your chest towards the surface before pushing back up, maintaining alignment and controlled movements throughout.
- Incline push-ups can be categorized as compound workouts, and they mostly target the chest, back, and arm muscles. Some of their variations include lifting one leg up, adjusting the weight bench height, and changing your hand position.
- According to a study by the National Institute of Health, incline push-ups executed on an unstable surface, such as an exercise ball, result in greater global muscle activity compared to doing them on a stable surface like a bench or box.
- In my view, incline push-ups are a versatile and accessible exercise option, providing a beneficial workout for both beginners and those looking to add variety to their upper body strength training.
How To Do Incline Push-Ups With Proper Form
As a trainer, I find that incline push-ups are excellent for targeting the upper chest, arms, and back, allowing you to fully utilize your body weight to engage the main chest muscles (pectoralis major).
Incline push-ups can be performed on a stable surface such as a box or bench, or on an unstable surface such as an exercise ball.
According to the National Institute of Health, when comparing an unstable surface to a stable surface, there is an increase in global muscle activity when performing incline push-ups on an unstable surface [1].
Compared to a regular push-up, the incline version offers a full range of motion with less resistance, making it more accessible for various fitness levels.
And here’s what’s involved.
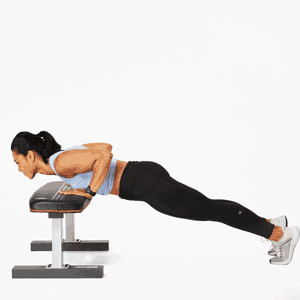
1. The Proper Incline Push-Up Setup

Place your feet about shoulder-width apart and stand your height away from an elevated surface like an exercise bench.
Lean forward and get your hands to rest on the bench.
You should be in an elevated plank where you keep your body in a straight line.
If you’ve been struggling a lot with enough strength for regular push-ups, then I would suggest placing your hands a bit more than shoulder-wide apart.
2. The Incline Push-Up Down Move

There are two things to keep in mind with the entire movement. First of all, there’s the breathing.
As you slowly lower your chest down towards the bench, you should be inhaling all the way.
This helps provide maximum oxygen for the more straining part of the push-up.
Secondly, you don’t want to aim to get this done as quickly as possible. Count to three while you lower your chest and inhale to maximize the amount of time your muscles are under strain.
3. The Powerful Upward Move

Once you get to the bottom, it’s time to push yourself back up again.
This time, you should exhale with force and count to two before you get back to your starting position.
It should all be a smooth and simple movement, and it’s important to keep your whole body in one straight line.
Also, make sure that you engage your core to get the most out of every single incline push-up.
Avoiding Common Mistakes

As a personal trainer, I constantly see people make simple mistakes with push-ups. And even though incline push-ups should be easier, mistakes can slip in quickly.
Here are a few things to avoid.
1. Poor Alignment
You have to keep your entire body in a straight line from your feet to your head for the whole movement.
When you don’t keep your body straight, you can add joint strain that results in a shoulder injury, and you could increase pressure on your lower spine as well.
2. Limited Core Muscle Engagement
The push-up movement itself doesn’t trigger the core, but the plank position does. However, when you focus more on your core muscles, then you should feel more of your own body weight, adding a muscle strain to better tone your stomach.
“Push-ups help in engaging your core or abdominal muscles as well as the triceps, pectoral muscles, shoulders, thighs and legs.”
- Plavaneeta Borah, Writer at NDTV.com
3. Lack Of Stretching
When you’re doing compound exercises like incline push-ups, you should always do a pre and post-exercise stretch.
I emphasize the importance of this approach both for individuals with injuries and for those aiming to prevent unnecessary muscle or ligament damage.
Additionally, if you have concerns about an existing injury, I always recommend seeking professional medical advice before engaging in compound exercises.
4. Limited Range of Motion
Not lowering the body enough or going too low can limit the benefits of incline push-ups.
The goal is to lower the body until the chest is close to the surface without touching it, then fully extend the arms on the way up.
5. Rapid, Uncontrolled Movements
Performing the push-ups too quickly and without control can reduce their effectiveness and increase the risk of injury.
It's important to execute the movement in a controlled manner, focusing on muscle engagement.
Incline Push-Up Variations

You might think that once you get used to the incline push-ups that it’s time to move onto regular ones.
But there are a couple of simple variations that make it a bit tougher.
1. Lift One Leg Up
This will challenge your balance and also your core. And one thing I suggest to people is that they alternate which leg they lift between every rep.
2. Change Your Hand Position
Another option to make it tougher on your arms is to bring your hands below your shoulders with your elbows close to your torso. It’s kind of like a military push-up that works the arms more than the chest.
3. Adjust the Weight Bench Height
Any kind of raised surface will work as long as it’s a stable surface. Either find a low bench or see if there’s a CrossFit box at your gym that’s about a foot high.
The further down you go to the ground, the more you’ll challenge your chest and triceps, and the closer you’ll get to doing regular or decline push-ups.
FAQs
Do Incline Push-UPS Build Muscle?
Yes, incline push-ups build muscle even if the strain isn’t as tough as a regular push-up. The advantage is that you can get through the full range of motion, which will better target your chest area.
And with slightly wider hand placement, you’ll also target your shoulders.
Should You Do Incline Push-UPS Every Day?
No, you shouldn’t do incline push-ups every day. Giving your shoulders, chest, and arms time to recover will speed up the muscle-building process and allow you to get better results in the long term.
References
- https://www.ncbi.nlm.nih.gov/pmc/articles/PMC9121296/
About The Author
You May Also Like