Dips are crucial for developing chest and shoulder muscles and building upper body strength.
To build upper body muscles and avoid injuries, it's important to perform dips with correct technique and form.
As a certified personal trainer, I've compiled key techniques, common mistakes, and benefits of doing dips on parallel bars and other equipment.
This article teaches the proper technique for bodyweight dips and effective alternatives for strength gain and muscle hypertrophy.
Quick Summary
- Incorporating dips into your weekly workout routine is key for effectively building upper body strength, especially in the chest and shoulder muscles.
- Achieving proper form in dips requires extended upper arms, a flat back, and lowering your chest to the level of the dip bars.
- Implementing progressive overload can enhance muscle hypertrophy by up to 30%, emphasizing the need for balanced training and recovery.
- In my experience, dips are an incredibly versatile and effective exercise for upper body strength, adaptable to various fitness levels with options like bench dips, ring dips, and weighted dips.
How to Do Dips With Proper Form

Here is how to perform dips with proper form and avoid unnecessary injuries:
- Assume a starting position on the parallel bars with your elbows fully extended and back flat.
- Slightly lean forward to decrease the angle between your chest and dip bars while bending your upper arms.
- Keep your back flat and legs straight (if possible), and avoid rounding your thoracic back during descending.
- Start the exercise by extending the shoulder and bending your elbows to initiate the descending phase.
- Slowly lower towards the parallel bars and aim to control the movement.
- Hold that position for a second when your chest reaches the level of the bars.
- Reverse the motion by flexing your shoulders and extending your elbows to return to the starting position.
- Perform up to 12 reps, 4 sets, and rest for as little as possible between the sets.
Related: Best Dip Bars
Dips Variations

All recommended dip variations are excellent to include in your strength training regime, but with proper programming and recovery plans.
The best way to make progress with strength training exercises such as dips is to incorporate the principle of progressive overload, as confirmed by the study published on the National Library of Medicine website [1].
This principle has also been shown to be the best for increasing hypertrophy and building lean muscle mass if coupled with adequate nutrition and a supplementation plan [2].
Failing to recover adequately after intense workouts can lead to overtraining, hindering progress [3].
The choice of dip variations should be based on specific goals: weighted dips increase muscular endurance, while ring dips enhance stability. Each variation provides a unique focus, optimizing muscle development and injury prevention.
You can only increase muscle mass if you include enough rest between training sessions exercising the same muscle group.
The general recommendation is to rest for up to 48 hours before exercising the same muscle group again [4].
"The dip develops serious upper body strength, stimulates triceps muscle growth, and improves lockout performance in the bench press for strength, power, and fitness athletes. It’s also pretty accessible."
- Mike Dewar, Certified Personal Trainer
Weighted Dips

Weighted dips are an excellent exercise for developing strong upper body, which is also an effective workout for women, especially the pectoralis major's lower fibers.
This advanced variation requires significant upper body strength.
How to Perform Weighted Dips
- Pick a sufficient weight plate or kettlebell to perform at least 6 reps of weighted dips without compromising your form or resting.
- Take a belt and a chain and connect the weight plate with the weight belt.
- Assume a starting position on parallel bars so the weight hangs between your legs.
- Start the exercise by initiating the descending phase of the lift by extending your shoulders and bending your elbows.
- Control the movement so the weight doesn’t shift and go from side to side since this can increase the likelihood of injury.
- Hold that position for a split second when your chest reaches the level of the bars.
- Reverse the motion by extending your elbow joint and bending the shoulders to return to the starting position.
- Repeat for 6 reps, 4 sets, and rest for 2-5 minutes between the sets.
Bench Dips
Bench dips, with their smaller range of motion, allow for higher rep volumes.
It is an excellent exercise for developing strong and bigger triceps, brachii, and deltoid muscles.
How to Perform Bench Dips
- Place the flat bench behind yours and ensure it is high enough for you to lower as much as possible to the floor without resting at any point.
- Take a starting bend dip position by placing your hands behind your back and on the weight bench.
- Keep your legs straight, hips slightly bent, and arms fully extended.
- Start the exercise by flexing your elbows and extending the shoulder to lower your body towards the ground.
- When you reach the bottom position of the lift on the end range of motion, hold that position for one second.
- Reverse the motion to return to the starting position by extending your elbows and flexing the shoulders.
- Repeat for up to 20 reps, 5 sets, and rest for as little as possible between the sets.
Also Read: Dips vs Bench Press
Ring Dips
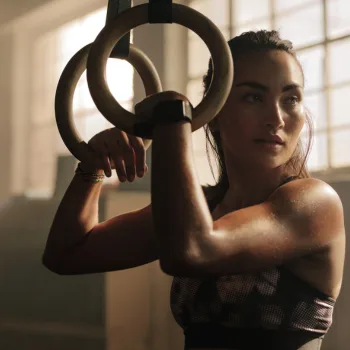
Ring dips offer greater shoulder mobility.
This is important because you can let your shoulders use their natural range of motion during the whole exercise, which is excellent for avoiding injuries.
How to Perform Ring Dips
- Place the rings at the same height and make them accessible so you can safely enter the dip position without injuring yourself.
- Assume a starting dip position with your shoulders fixed and elbows fully extended so your body is balanced.
- Start the exercise by slowly lowering your body towards the rings by flexing your elbows and extending your shoulders.
- Hold that position for a split second when your chest reaches the level of the rings.
- Reverse the motion by extending your elbows and bending the shoulders to return to the starting position.
- Repeat for 8 reps, 4 sets, and rest for 3 minutes between the sets.
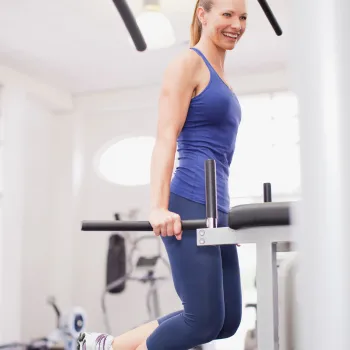
Assisted Dips
Assisted dips are the best variation for beginners since you can use equipment such as these recommended resistance bands to help you perform the movement without injuries.
How to Perform Assisted Dips
- Pick a resistance band of sufficient strength and tension, and wrap or below your knees and the parallel bars.
- Assume a starting dip position with your shoulders fixed, elbows fully extended, and the band wrapped between the bars and the knees.
- Start the exercise by slowly lowering your body towards the floor by flexing the elbows and extending the shoulders.
- Hold that position for one second when your chest area reaches the parallel bars level.
- With the help of a resistance band, reverse the motion by extending your elbows and flexing the shoulders to return to the starting position.
- Repeat for 10 reps, 4 sets, and rest for as little as possible between the sets.
Dip Machines
Machine dips are beginner-friendly, simplifying the exercise execution.
However, one downside of this variation is the insufficient activation of stabilizer muscles during the whole exercise, which isn’t the best if you are a beginner looking to develop your body holistically.
How to Perform Dips on the Machine
- Assume a starting dip position on the machine.
- Your elbows should start in the fully locked position, and your shoulders should be fixed in the anatomical position.
- Start the exercise by lowering your body towards the floor with the help of the dip machine.
- Hold that position for one second when your chest reaches the level of the parallel bars.
- Reverse the motion by extending your elbows and flexing the shoulders to return to the starting dip position.
- Repeat for 12 reps, 4 sets, and rest for 3 minutes between the sets.
Dips Form Checklist

Here is a comprehensive dip form checklist to get the most out of the exercise and avoid injuries:
- Grip width - Both hands must be under your shoulders and outside your hips.
- Grip - The bars should be held low and close to the wrists. Squeeze the bars and use a full grip.
- Forearms - Your forearms should be vertical from all angles. This counts for both the way up and the way down.
- Elbows - You must lock the elbows at the top position. Tuck the elbows at 45 degrees at the bottom. Avoid flaring them or touching your torso.
- Chest - Ensure to raise your chest before you lower yourself towards the ground. Also, lift your chest between the reps at the top position.
- Shoulders - Push the shoulder down and back. Avoid letting them roll forward. Also, don't shrink your shoulders.
- Head - Your head should be in line with your torso. Avoid looking at the ceiling; instead, look at the floor in front.
- Torso - Slightly put your torso in an incline position for added balance. In addition, lean slightly forward while lowering yourself.
- Lower back - Never over-arch your lumbar spine. Aim to stay neutral so there is a straight line from knees to shoulders.
- Legs - Cross your feet and bend your knees. Also, keep your legs straight if you have high bars.
- Top - your arms must be straight, elbows fully locked, chest facing up, shoulders pushed down, and torso slightly inclined.
- Down - Take a big breath, raise your chest, bend your arms, and lean slightly forward.
- Bottom - Lower your body towards the floor until your shoulder reaches the level of the bars.
- Way up - Return to the starting position by extending your elbows and bending the shoulders. Keep your shoulder down, and don't look up.
- Lockout - Keep your arms straight, elbows fully locked, chest up, shoulders depressed, and head neutral.
- Breathing - Remember to inhale at the top, hold it on the way down, and exhale at the top.
Muscles Worked

The muscle worked during all dip variations, including pectoralis major, triceps brachii, and anterior deltoid.
The muscle worked during all dip variations, including pectoralis major, triceps brachii, and when you do an anterior deltoid exercise.
However, the core musculature helps stabilize the entire movement and avoid injuries.
Your shoulder rotator cuff muscles also work in certain variations, especially in the dip alternative with gym rings.
Dip Form Mistakes

Here are the most common dip form mistakes.
"Foregoing free weights — for a few weeks or months — has a few key benefits. For one, bodyweight exercise is convenient. You need yourself and a floor to train effectively. You’ll train stabilizer muscles you often forget about and gain mastery over your weight (which is useful for athletes like rock climbers or Brazilian jiu-jitsu players.)"
- Andrew Gutman, Certified Personal Trainer
Poor Upper-Body Position
The poor upper body position includes rounding your back, excessively bending your legs, and leaning forward too much.
Keeping your back flat during the entire workout will help you avoid injuries or execute the worst exercises efficiently.
Avoid leaning forward excessively to prevent limited joint motion and potential muscle imbalances.
Flaring Your Elbows

You should always keep your elbows as close to your body as possible to avoid shoulder and elbow injuries.
Certain parallel bars are placed, so keeping the elbows close to your body seems impossible.
In that scenario, I advise avoiding performing dips on those bars since that can only cause more injuries than yield benefits.
Messing Up Your Range of Motion
Even without excessive forward leaning, the range of motion can be compromised by not going down enough. I learned this the hard way when I noticed limited progress in my tricep development until I started focusing on the full depth of each dip.
This is why it is recommended to go at least where your shoulders are at the level of the bars.
While you can try going lower than the bars, be cautious to avoid shoulder ligament injuries.
Weak Grip and Bent Wrists

Before including dips in your regular workout session, building sufficient grip and wrist strength is essential.
It is impossible to perform dips correctly if you lack strength in these two parts.
I recommend performing dead hangs for a week or two before doing dips to build that grip and wrist strength and avoid injuries.
FAQs
Is 20 Dips Hard?
More often than not, doing 20 dips is hard. However, it will primarily depend on your current fitness level, age, morphology, and many other things if performing 20 dips will be hard or not.
How to Do Dips for Lower Chest?
Every dip and its alternative is already hitting the lower chest fibers. However, if you want to experience muscle hypertrophy in the lower chest, add more weight to the dip movement and incorporate the principle of progressive overload.
How Many Dips Did Mike Tyson Do?
Mike Tyson did 500 dips daily. Tyson's brutal workout included 2000 squats, 2500 sit-ups, 500 dips, 500 push-ups, 500 barbell shrugs, and 10 minutes of challenging neck exercises.
References:
- https://www.ncbi.nlm.nih.gov/pmc/articles/PMC4215195/
- https://www.ncbi.nlm.nih.gov/pmc/articles/PMC6950543/
- https://www.ncbi.nlm.nih.gov/pmc/articles/PMC3435910/
- https://www.ncbi.nlm.nih.gov/pmc/articles/PMC6015912/
About The Author
You May Also Like